Record live TV at home with AerialTV Server
A free companion that records your IPTV channels on a computer or NAS. Schedule from Aerial TV on your iPhone, iPad, Apple TV or Mac, then watch later. Recording continues even when the app is closed.
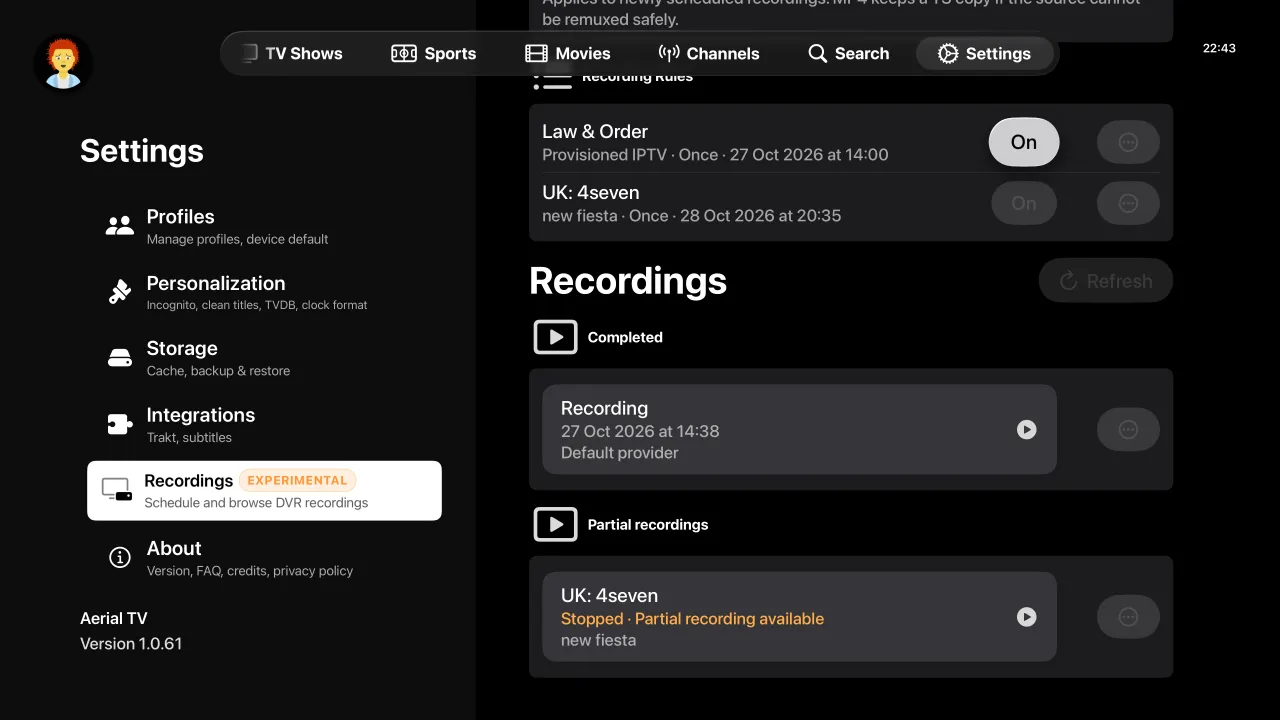
Three steps, about ten minutes
1. Install the server
Put AerialTV Server on a Mac, PC or NAS that stays on at home.
2. Connect the app
In Aerial TV, open Settings > Recordings and select your server.
3. Record
Hold Select on a programme in the guide and choose to record. Watch it later.
Choose your computer
Not sure? Pick the one you will leave running at home. A Mac with an M-series chip is the simplest option.
This is an experimental release
AerialTV Server is new, and the first release works on your home network only. Expect rough edges, and check that a recording worked before you rely on it for something you cannot replay. If something goes wrong, tell us on Support or r/AerialTV.
Mac
scienceExperimentalRecommended for youEasiest option. A menu bar app with everything included. You need a Mac with an Apple M-series chip (M1 or later). Intel Macs are not supported. To check, open the Apple menu and choose About This Mac.
downloadMac (Apple silicon) · 29 MB- 1Open the downloaded ZIP and drag AerialTV-server into your Applications folder.
- 2Open it. Confirm the usual macOS prompt, and allow incoming connections if asked so your other devices can reach it.
- 3The server starts from the menu bar and opens its setup page. Leave the Mac awake and the app running.
Tip: add the app to your login items so it starts automatically. Quitting the app stops the server and any recording in progress.
Windows PC
scienceExperimentalRuns through Docker Desktop. You need a 64-bit PC with Docker Desktop installed, set to use Linux containers (WSL 2). A native Windows app is not available yet.
- 1Install Docker Desktop and keep it running.
- 2Extract the starter kit into a folder and put the Intel/AMD image file in the same folder.
- 3Open a terminal in that folder and load the image:
docker load -i AerialTV-server-0.1.0-rc2-linux-amd64.tar.gz - 4Start the server:Then open
docker compose up -dhttp://localhost:8080.
Linux or NAS
scienceExperimentalFor an always-on Linux machine or a NAS with Docker. Choose the image that matches its processor. If you are unsure, most home servers and NAS devices are Intel/AMD.
- 1Extract the starter kit into a folder and put your image file next to it.
- 2Load the image that matches your hardware:
docker load -i AerialTV-server-0.1.0-rc2-linux-amd64.tar.gzOn an ARM64 device use
AerialTV-server-0.1.0-rc2-linux-arm64.tar.gzinstead. - 3Start the server:Then open
docker compose up -dhttp://SERVER-IP:8080from another device.
NAS devices need a Docker or container runtime. Dedicated Synology and QNAP installers are not included. Never run docker compose down -v, as it deletes your recordings.
How do I check my download is genuine?
Each file lists a SHA-256 checksum. After downloading, compare it with your file’s checksum. On a Mac or Linux:
shasum -a 256 AerialTV-server-0.1.0-rc2-macos-arm64.zipOn Windows PowerShell:
Get-FileHash AerialTV-server-0.1.0-rc2-linux-amd64.tar.gz -Algorithm SHA256If the result does not match the value shown here, download the file again.
Connect Aerial TV to your server
- 1Keep your Apple device and the server on the same home network.
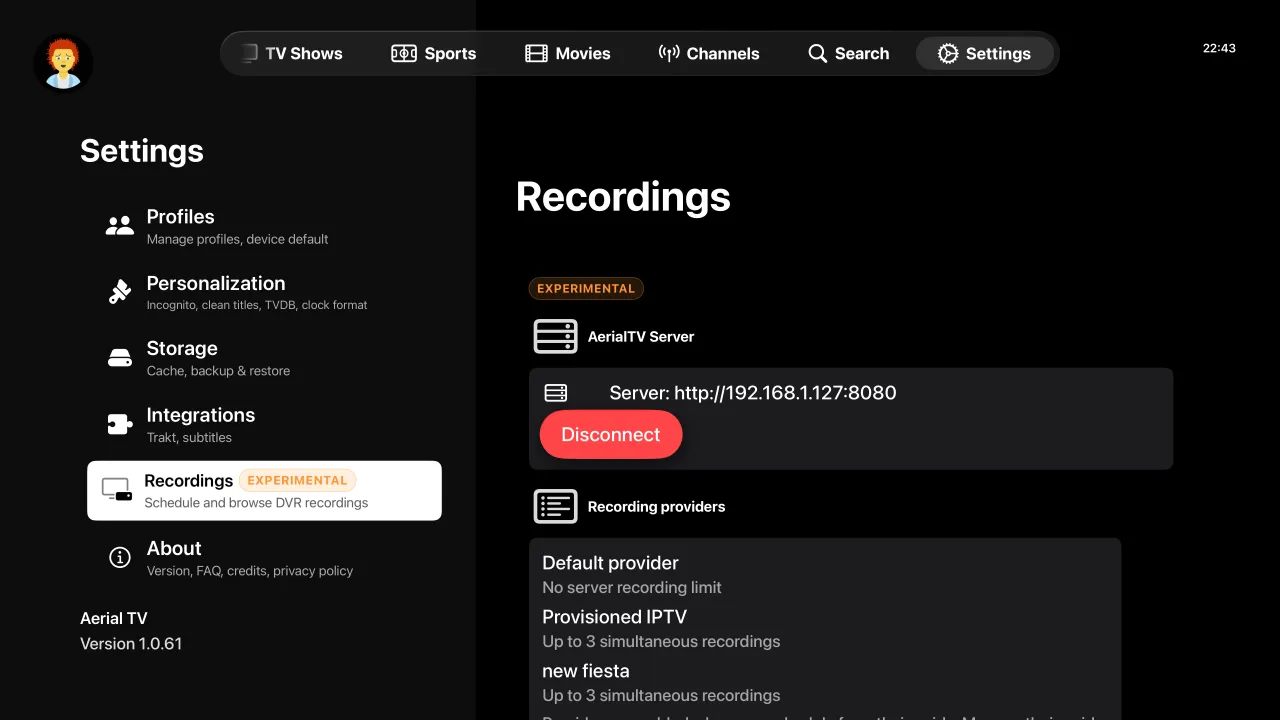
- 2In Aerial TV, open Settings > Recordings and select your server.
- 3If it is not listed, enter its address, such as
http://192.168.1.127:8080. Use the server’s network address, not localhost. - 4Allow Local Network access if your device asks.
Using Docker? Entering the address manually is normal, because automatic discovery often cannot cross the container network.
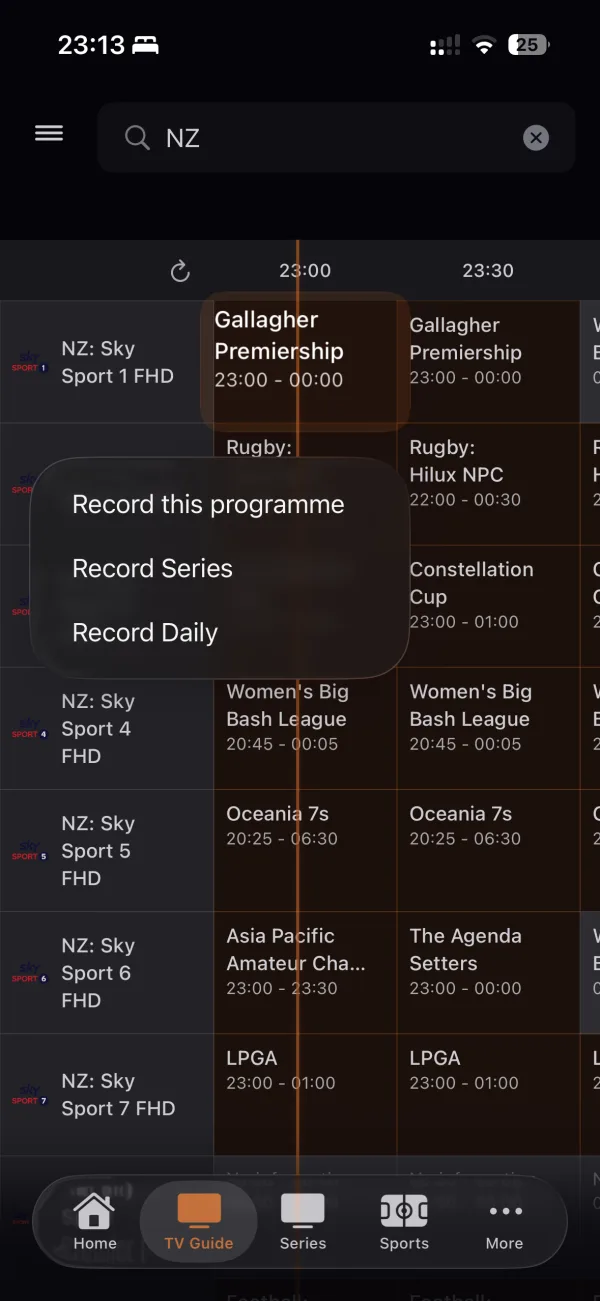
Record straight from the TV guide
Once your server is connected, pick any programme in the guide and choose how to record it. On iPhone, iPad and Mac use the programme’s menu. On Apple TV, hold Select on the programme.
- fiber_manual_recordRecord this programme — One-off recording of just this showing.
- fiber_manual_recordRecord Series — Record every new episode as it is scheduled.
- fiber_manual_recordRecord Daily — Record this time slot every day.
Series and daily recordings need your provider’s guide data. Manage rules and watch recordings under Settings > Recordings.
Good to know
Home network only
This first release works on your local network. Do not forward its port to the internet.
Keep it on
The computer or NAS needs to stay awake and the server running for scheduled recordings.
Provider limits apply
Your IPTV provider may limit simultaneous connections, which limits how many recordings can run at once.
Experimental
Expect rough edges. Please report problems from Support so we can fix them.
Questions
Do I need the server to use Aerial TV?
No. Live TV, the guide, movies and series all work without it. The server only adds scheduled background recording.
Does the app need to stay open while recording?
No. The server captures the stream, so recordings continue while the app is closed. The computer or NAS running the server does need to stay on and awake.
Does it work away from home?
Not yet. This first release is for your home network only. Remote access is not included, and you should not forward the server’s port to the internet.
Which Aerial TV apps work with it?
Aerial TV on iPhone, iPad, Apple TV and Mac. Update the app to the latest version from the App Store.
How many recordings can run at once?
That depends on your IPTV provider. Many providers limit simultaneous connections, and watching live on another device can use one. Set each provider’s limit in Settings > Recordings.
What format are recordings?
You choose TS or MP4 for new recordings, plus a resolution cap and audio language. Recording copies the stream and does not re-encode it.
Does Aerial TV provide channels?
No. Aerial TV and the server only record streams from the IPTV source you already use. Only record content you have the right to record.
Stuck? Read the full setup guide or visit Support.